Launching VPC Resources
How I used Amazon VPC in this project
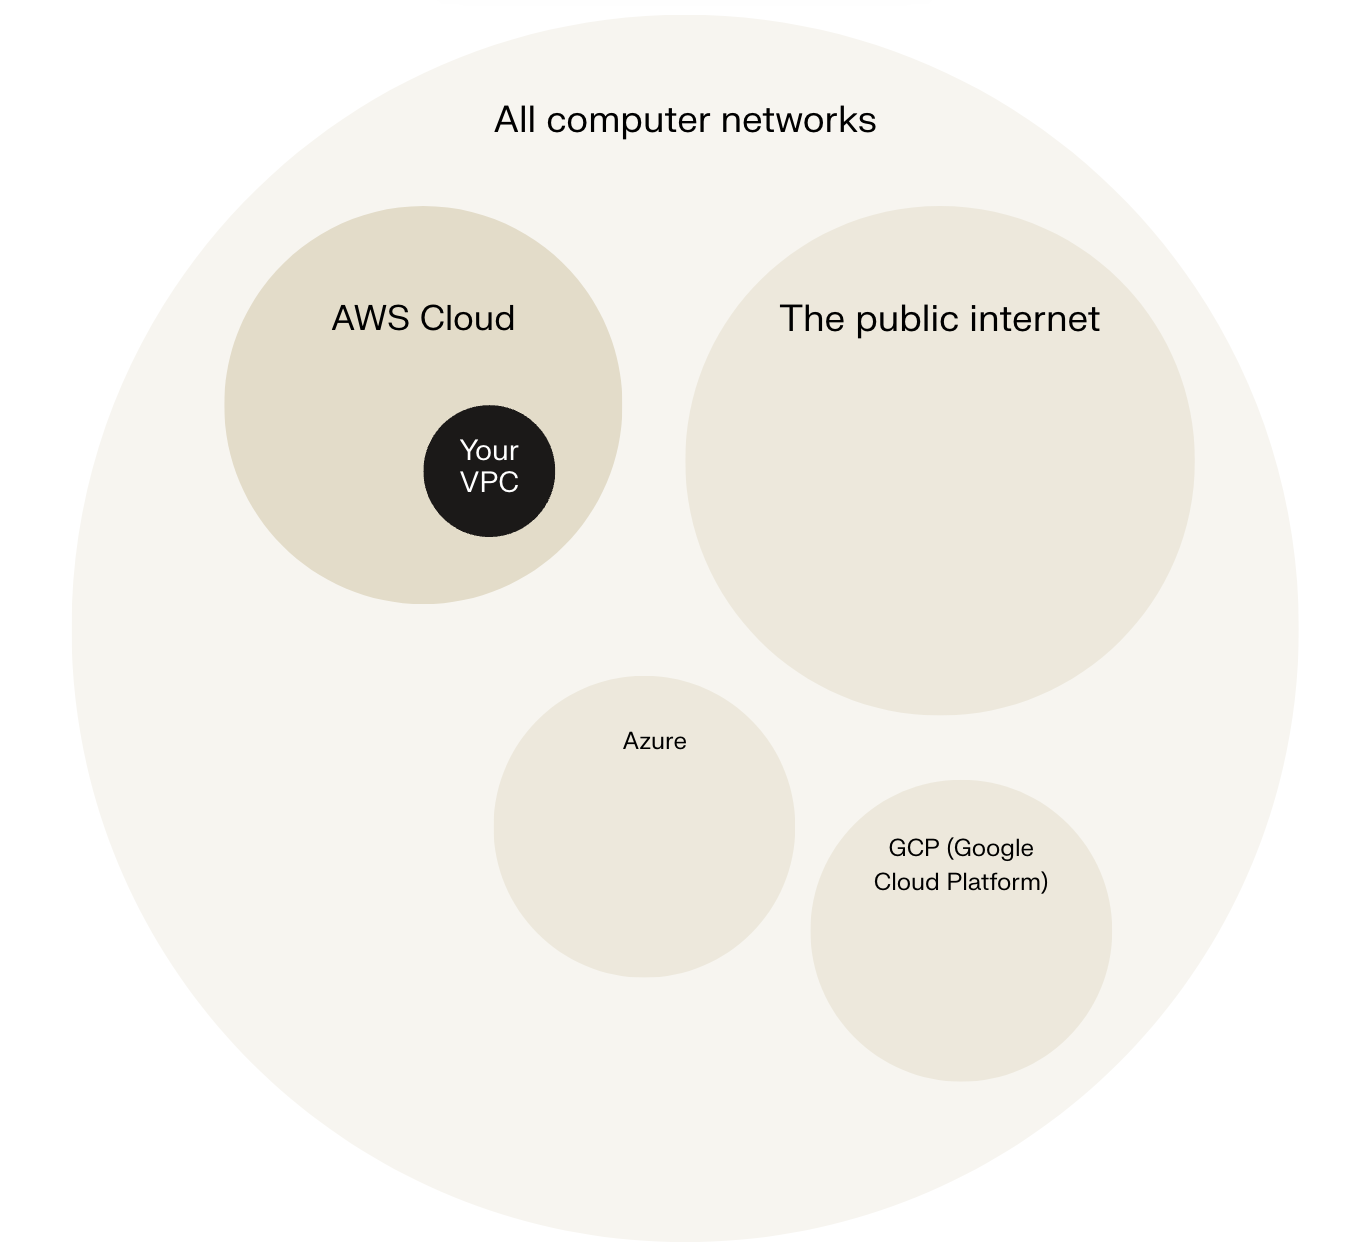
I used Amazon VPC to launch EC2 instances in a logically isolated virtual network with public and private subnets, security groups, and gateways for secure communication between servers.
Setting Up Direct VM Access
Direct access to an EC2 instance means logging into its OS over the internet for tasks like installing software or troubleshooting, unlike the AWS Console's resource management interface. Use your key pair for SSH connections to perform these deeper administrative operations.
SSH is a key method for directly accessing a VM
SSH traffic refers to data transmitted using the Secure Shell (SSH) protocol, which is a cryptographic network protocol designed to securely connect to and operate network services over an unsecured network. It enables encrypted remote logins, secure command execution, and encrypted file transfers between a client and a server. SSH traffic typically passes over TCP port 22 and ensures confidentiality and integrity by encrypting all data exchanged, protecting it from eavesdropping, tampering, and unauthorized access during transmission. This secure communication channel is essential for managing remote systems safely.
To enable direct access, I set up key pairs. Key pairs provide secure access to EC2 instances by using asymmetric cryptography, which involves a pair of mathematically related keys: a public key and a private key. The public key is installed on the EC2 instance, while the private key remains with the user. When connecting, the private key decrypts data encrypted by the public key, ensuring that only the user with the corresponding private key can securely access and authenticate to the EC2 instance. This method guarantees that access is both secure and authenticated, protecting the instance from unauthorized logins.
Private keys, like documents in PDF, DOCX, or TXT formats, come in various types suited to specific systems, including PEM (Privacy-Enhanced Mail), PPK (PuTTY Private Key), DER (Base64-encoded for RSA), and OpenSSH formats. PEM, originally for securing emails, has become the standard for AWS EC2 and many servers due to its broad compatibility as a Base64-encoded ASCII file with headers like "-----BEGIN RSA PRIVATE KEY-----". Selecting the correct format—PEM for OpenSSH/Linux or PPK for PuTTY/Windows—ensures seamless SSH access without conversion issues.
Launching a public server
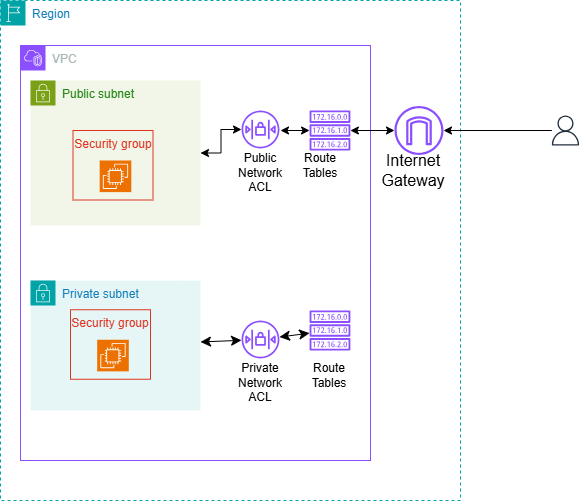
I had to change my EC2 instance's networking settings by editing its configuration to select the correct VPC and public subnet. This ensured that the instance was properly connected within the desired virtual private cloud and had internet access through the assigned subnet. Adjusting these settings is crucial for guaranteeing the EC2 instance can communicate externally and be managed as intended within the network architecture.

Launching a private server
My private server has its own dedicated security group because security groups act as virtual firewalls that control inbound and outbound traffic specifically for that instance. Having a separate security group allows for tailored rules that protect the private server by restricting access only to trusted sources and necessary ports, enhancing security by limiting exposure. This isolation also enables precise management of communication between instances, ensuring that only authorized traffic flows between the private server and other resources, thereby reducing potential attack surfaces and improving overall network security.
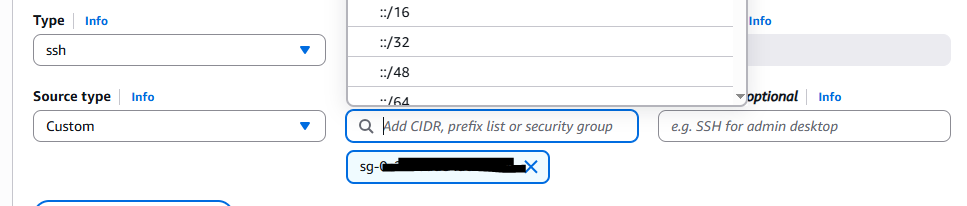
My private server's security group's source is the public security group, which means inbound traffic is allowed only from EC2 instances associated with that public security group, based on their private IP addresses. This dynamic referencing enables secure, controlled communication between the public and private servers without exposing the private server to the internet or fixed IP ranges, automatically adapting as instances join or leave the public group. It follows AWS best practices for least-privilege access in VPCs, reducing attack surfaces while permitting necessary inter-instance traffic like SSH.
Speeding up VPC creation with Resource Wizard
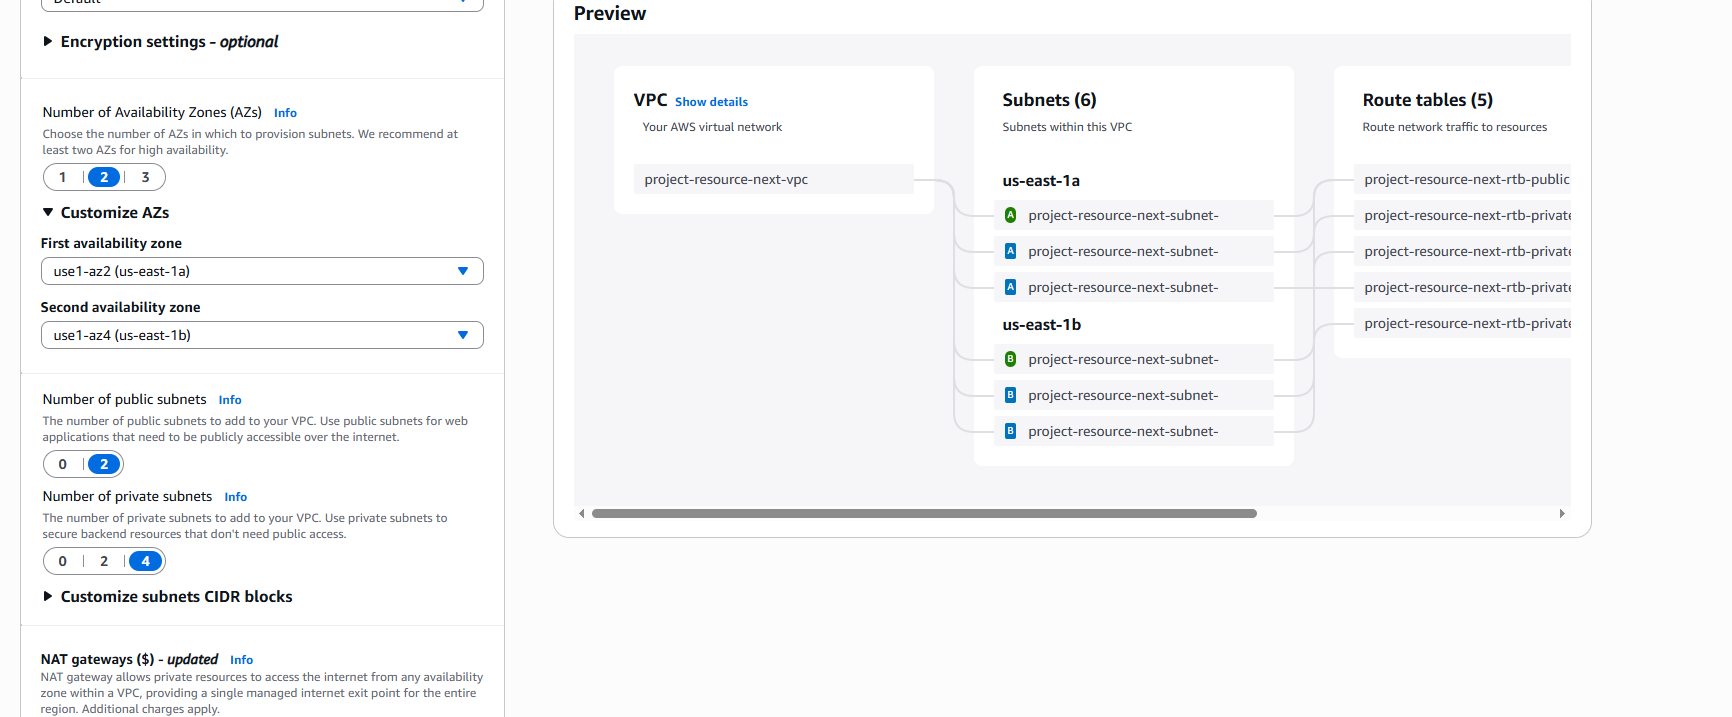
I used an alternative method to set up an Amazon VPC by leveraging the VPC Resource Map feature in the AWS Management Console. This visual tool displays VPC resources like subnets, route tables, internet gateways, and NAT gateways with their interconnections on a single page, simplifying configuration and validation. It enables quick setup in minutes by previewing architecture, customizing CIDR blocks and Availability Zones, and spotting misconfigurations before launch.
A VPC resource map is a visual representation within the AWS Management Console that displays all resources in a Virtual Private Cloud (VPC) and their relationships on one page. It shows components such as the VPC itself, subnets (public and private), route tables, internet gateways, NAT gateways, and gateway endpoints, with solid lines representing resource connections and dotted lines indicating network traffic flows. This tool helps users understand their VPC architecture quickly, see how resources interconnect, and manage network configurations more efficiently by providing details and insights into the network layout at a glance.
My new VPC has a CIDR block of 10.0.0.0/16. It is possible for my new VPC to have the same IPv4 CIDR block as my existing VPC because different VPCs are logically isolated networks that do not route traffic directly to each other by default, allowing overlapping private IP ranges from RFC 1918 spaces like 10.0.0.0/8 without conflicts. However, identical CIDRs prevent VPC peering or merging later due to non-unique addresses in a combined space, so plan distinct ranges for future connectivity needs.

Tips for using the VPC resource map
When determining the number of public subnets in my VPC, I only had two options because AWS recommends creating subnets across multiple Availability Zones (AZs) for high availability and fault tolerance. Typically, for a region with two AZs, you create one public subnet in each AZ, resulting in two public subnets. This design ensures that resources remain accessible even if one AZ fails, aligning with AWS best practices for distributing subnet resources evenly across AZs and enhancing resilience.
The setup page also offered to create NAT gateways, which are managed AWS services placed in public subnets that enable instances in private subnets to initiate outbound internet traffic (e.g., for software updates or API calls) while preventing unsolicited inbound connections from the internet. They perform source NAT by translating private IP addresses to the NAT gateway's Elastic IP, routing through an Internet Gateway, and require association with a public subnet and route table updates for private subnets. This enhances security by keeping private instances isolated without public IPs.